

It's a sign of wisdom to recognize when something resonates with your personality and go with it. By way of illustration I'll share my discoveries with joinery.
Insert Joinery My experience in writing for Woodsmith and ShopNotes gave me a bias toward (more or less) traditional wood joinery techniques. Later on, my dad gave me his older Porter Cable biscuit joiner. Around the same time, I learned about loose tenon joinery made with single-purpose router jigs. Combine those with the way my brain works, and now I prefer to create case and frame joints with some sort of wood insert: dowels, biscuits, loose tenons (Dominos).
Single-use router jigs are nice. However, making one for each project adds another mini-project to each build. My other hangup is that for each joint, you need to secure the workpiece, then clamp the jig in place. That can end up being a lot of clamping and unclamping.
Horizontal Slot Mortiser In my head, the perfect solution would be a small slot mortiser. These give you excellent visibility and flexibility for all kinds of workpieces and are ideal for loosen tenon construction.
I've always admired the efficiency of European table saws that include a slot mortiser on one side. Nice compact table, simple controls ...
Sure stand-alone slot mortisers are availble. However these industrial machines take up more space than I can give and are expensive.
The router-based super jigs you'll no doubt suggest try to do too much, in my opinion. These also hurt my wallet area. As much as I love using a router, I was hoping for a machine that wasn't so high-pitched.
Chris Fitch designed a shop-made horizontal mortiser that I really like. I thought I could make a scaled-down, simpler version for my garage shop. I got a prototype complete, but the router carriage wasn't smooth or reliable.
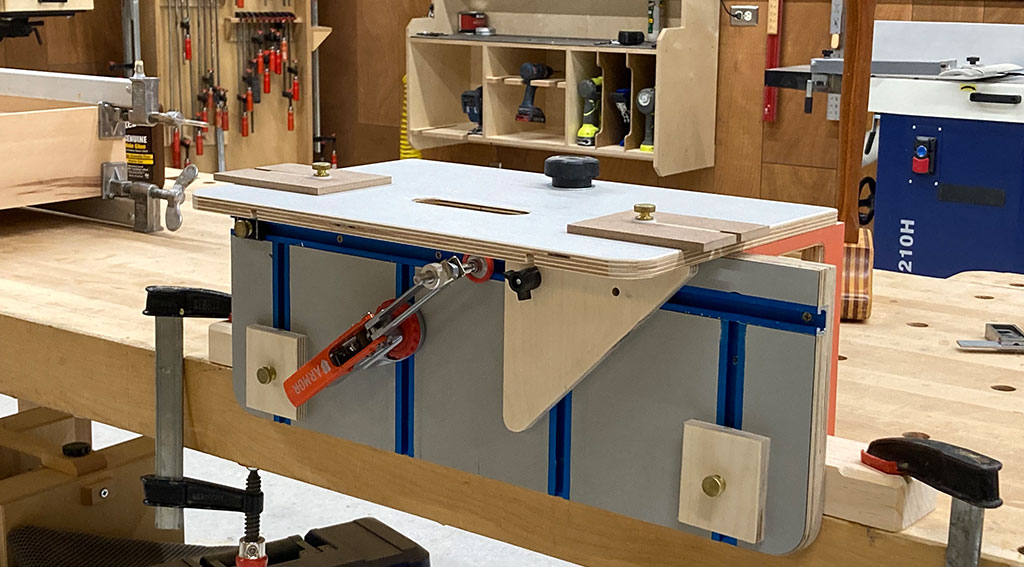
In the end, my desire for simple over-ruled my abilities to come up with a horizontal router jig. The results are what you see here. It's a mashup of a jig Chris designed for ShopNotes combined with the table I had fashioned for my horizontal prototype, along with a concept I used in a jig and technique I wrote about in Woodsmith. That's a lot to take in — one at a time.
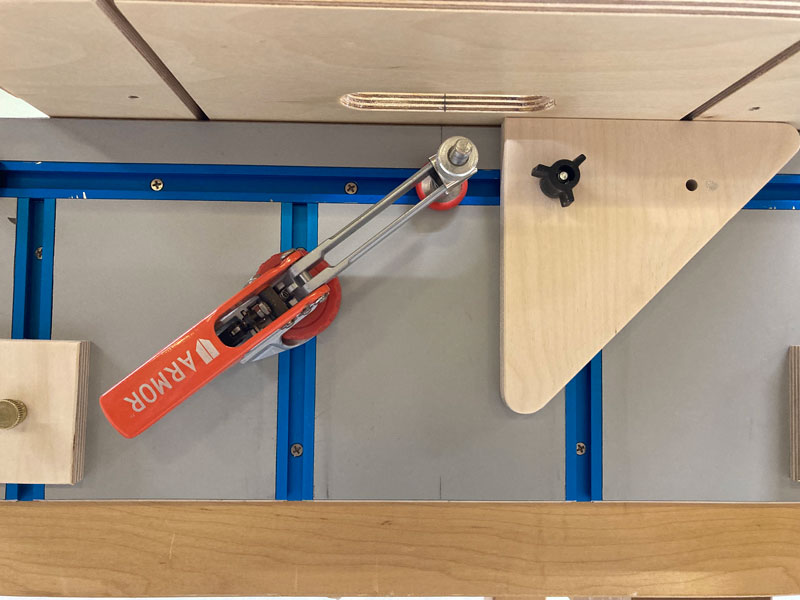
The upright nature of this jig makes the router easier to handle. The setup of the stops, the sliding top, and the clamps in the face means I can swap out workpieces pretty quickly.
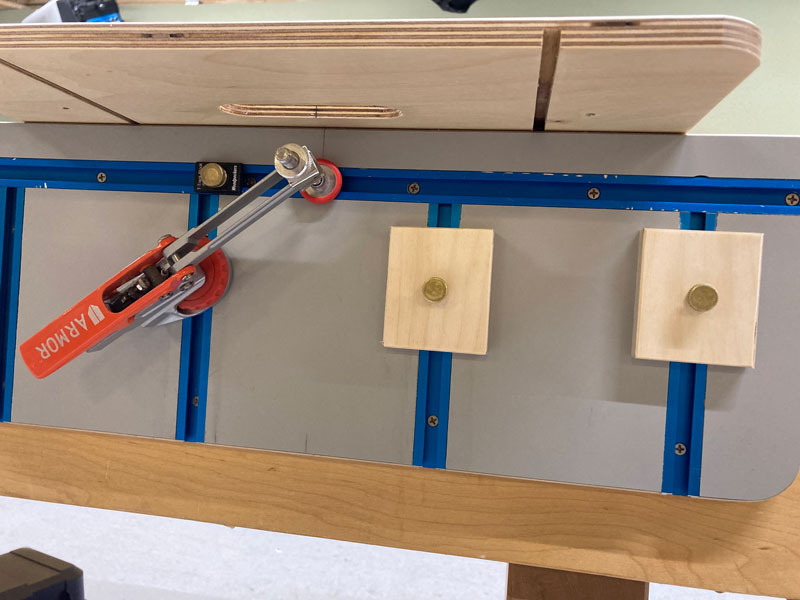
The horizontal router jig has a table with T-track for adding stops, workpiece supports, and auto-adjusting clamps. These are all important for me. The fence has a square reference surface to keep parts perpendicular to the bit. The opposite side has a 45° edge for those 1% miter functions.
The main modification to the jig plan was to use a 1"-wide slot on the top, rather than plowing a channel to match the width of the router base. The slot is sized for a 1" OD guide bushing. This means I can use both my small palm router (for lighter duty work) as well as my larger PC-690.
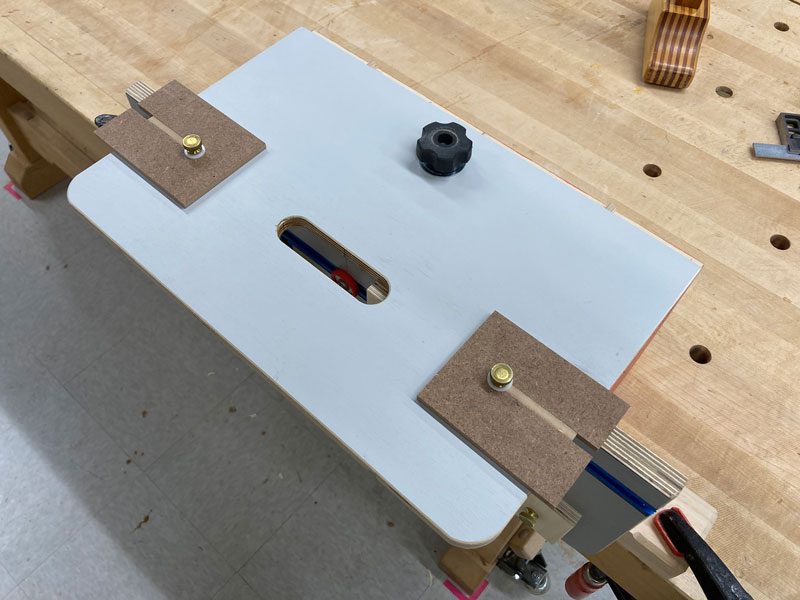
I scribed centerlines in the slot to ease the jig's initial setup.
I've learned enough about woodworking — and myself — to know that this may not be a permanent solution. And my own preferences will likely change. But in the meantime, I've found a compact method to create consistent mortises with little fuss. That's all I can ask for my shop time.